Showing posts with label Sea Life. Show all posts

Tuesday, October 4, 2016

Clay 1 : The Art of the Pinch Pot: Fish

This was the second class of a 4 week after school clay workshop for K-2nd grades. We continued with the Pinch Pot technique and made fish this week.

Materials Needed
White low fire clay
Sketchbooks
Pencils
Modeling tools
Water in small containers 
Canvas mats to work on
Scrap paper to place finished work on

1. I set out about a dozen images of fish sculptures made by various artists. We discussed the use of different media (metal, wood, clay, paper, mixed media, etc), the types of fish made, sizes, expressions, and use of color and detail to add interest.
2. Students then spent a few minutes making drawings in their sketchbooks to generate ideas for fish they wanted to make in clay.


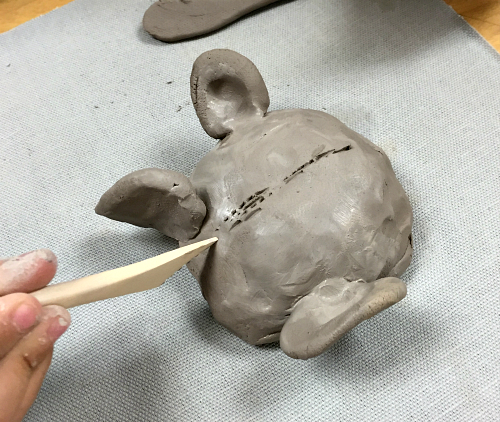
3. We briefly reviewed the Pinch Pot technique used last week to make mice families. Students got a ball of clay which they split in half. They rolled one piece into a ball and pinching it, made a bowl shape. 


4. The bowl shape became the body of the fish. These could be elongated with gentle tugging and shaping or left in a circular shape. The other ball was then divided into smaller bits to make fins, tails, eyes, and lips for the fish.  Quick reminder to moisten the two pieces of clay being joined and to use modeling tools to smooth where the pieces were connected, to ensure a strong bond.

5. Next, modeling tools were used to add textural details to the body, fins, and tail. I reminded them to turn the sculpture and view it from all sides to ensure they were satisfied with its appearance from each angle.

6. Finally, all clay pieces were put on scraps of paper with each child's name. Names are later scratched on the bottom after allowing the pieces to dry a bit. All fish were set aside to dry and will later be fired and glazed.

Thursday, May 12, 2016

Intro to Clay 1 : The art of the pinch pot : Fish

Making Pinch Pot Fish
This is week 2 of a 4 week clay workshop for students in Kindergarten, first and second grades. We used the pinch pot techniques we learned last week as a starting point and ventured off into creating fish.

This week, we were fortunate to have local artist Tina Preece working with us. Tina does extraordinary things with clay in the areas of sculpture and pottery, and we were glad she was with us to share her expertise.

Intro to Clay : The Art of the Pinch Pot : Fabulous Fish!

Materials Needed
Sketchbooks
Pencils
Clay (we used low fire white)
Clay tools
Fabric mats
Water

Fish Sculptures we viewed to get ideas
 1. We looked at fish sculptures made by various artists and discussed materials used, texture, facial expression, and use of details to add interest.

2. Students spent a few minutes drawing fish in their sketchbooks.


3. I did a brief demo, reviewing pinch pot techniques we covered last week. Each artist received a 4 oz ball of low fire white clay. We popped our thumbs into the center of the clay and made pinch pots, making sure the walls of the pot were about the same thickness as our pinky fingers.

4. Flipping the pot upside down, we adjusted it into a fish body shape. Options included leaving it somewhat round, or creating a longer, skinnier fish by gently pulling on the clay to lengthen.

5. Each student received a second ball of clay, 2 oz in size. They pinched this off into smaller bits to create tails, dorsal fins, side fins, and eyes. Each new shape added to the fish body was scored with tools, moistened with water, and firmly attached to the main body shape.


6. For the final step, they used their modeling tools to add scales and other textural markings. All pieces will be fired and later glazed.


The final sculptures.