Tuesday, December 13, 2016

Clay 3 : Reception and Exhibition of Children's Clay Art

Student's display
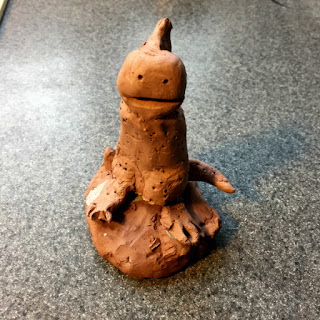
 We completed our Clay After school workshop for students in third through fifth grades. During the five sessions, we created Story Teller Figures, Dragons, Gargoyles, and Vessels, using a variety clay and finishing techniques. At the completion of each workshop, we hold a Reception and Exhibition. Students self curate their work and this event provides an opportunity for them to showcase their work and answer parents' questions about the various topics and techniques they learned over the course of the workshop.

Special thanks to art teacher Sarah Sheckells for making this possible. Also, to local artist Tina Preece for her classroom assistance and expert firing of students' work.
Story Teller, Dragon, Gargoyle, and dish
Gargoyle, Story Teller, Dragon, and dish
Cat Gargoyle
Dragon
Animal Story Teller Figure
Glazed Dragon
Display of visuals used during the workshop
More visuals used during the course
Completed dish
Completed dish

Clay 3 : Dishes inspired by Nature

Student made dish using natural materials
Week 4 of our Clay 3 After school workshop for students in grades 3 through 5. The main focus this week was on using a slab technique to create a footed vessel.

Materials Needed
Sketchbooks and pencils
Low fire white clay
Food safe glazes
Canvas mats for work surface
Clay tools
Water
Assorted collection of branches, leaves, stones, shells, etc.
Newspaper and masking tape
Cardboard bats for storage of pieces during drying

Directions:
1. We looked at and discussed different types of vessels people use for various reasons.  

2. We spent a few minutes making quick drawings in our sketchbooks to generate ideas for designing the surface of our vessels (bowls).

3. Each student got an 8 oz ball of low fire white clay. Using their hands, they patted it out into a large pancake shape, smoothing the edges. 

4. Using the clay tools, we changed the rim of the bowl to create an uneven, organic look to the edge.

5. Next, we used a variety of natural elements to press into the top surface of the bowl, pressing hard and allowing the leaves to stay in the clay.
Dishes drying in preparation for firing
 
Embellishing with items from nature

6. Borrowing an idea I found on a children's clay website, we picked up the printed slab pancakes and slapped them onto our bent knees!  They liked this part of the lesson. A few slapped their bowl two or three times until their bowls were the desired shape.

7. Next, we wadded up newspaper and wrapped with masking tape, securely taping the crumpled wads onto cardboard bats.
We draped the shaped bowls over the newspaper. 


8. After that, we used a bit of additional clay to make 3 feet and added them securely to the bottom of the bowls.

9. Final step: We turned the whole thing upside down and gently pressed the feet of the bowls on a table top to create flattened bottoms. We then turned the bowls back, feet up, to dry.

After the bowls were dry, they were fired.

Dried pieces in kiln ready for firing

10. For decorating, the students painted a thick layer of food safe glaze on the top surface and then put the bowl under a gently, running faucet (over a bucket so as not to allow glaze water down the sink) to rinse some of the glaze off. After blotting the bowls with paper towels, everyone glazed the under sides of their bowls (leaving the bottoms of the feet unglazed).
Student work
Student work

Student work

Clay 3 : Gargoyles

Lion gargoyle
Wolf Gargoyle
Eagle Gargoyle
Week 3 of our Clay 3 After school workshop. The topic of interest this week was Gargoyles.

I've always been fascinated by the gargoyles I've seen on my many travels and decided it would be a fun subject matter for the third through fifth grade students participating in this clay workshop. Doing a web search, I discovered these images, all of animal gargoyles and used them as inspiration in creating our own versions in red clay.

Materials Needed
Sketchbooks and pencils
Low fire red clay, 6 oz per student
Clay tools
Water
Canvas mats for work surfaces
Cardboard bats for storing work

Directions
1. I put out a set of gargoyle images from around the world taken off the web. I stuck with an animal theme and led a discussion about the images.

We looked at things like:
*Materials used (carved stone)
*Location of gargoyles (on exterior of buildings, up high)
*Subject matter (in this case, animals)
*Meanings of animals used (strength, courage, loyalty, etc)
*Function (to direct rain water away from the building, hence the open mouths).

2. Students spent a few minutes drawing ideas in their sketchbooks to generate ideas. They were to consider what qualities an animal had and which animal they'd choose for their own sculpture.

3. After they decided what animal they wanted to do, students watched a brief demo I did on construction, dividing the clay into parts for main body shapes, limbs, and details. I emphasized using techniques previously used in firmly attaching all parts to the main shapes, to ensure stability.


4. Students spent the rest of the hour building their gargoyles, adding texture and detail with tools. When all works were finished, we set them on cardboard and in boxes for drying. 


5. These pieces were later fired and left with their natural finish.


Monday, November 28, 2016

Clay 3 : Dragons

Week Two of our Clay 3 After school workshop. This week's focus was a favorite among students, Dragons.

Materials Needed
Sketchbooks and pencils
Low fire white clay
Clay tools
Water
Canvas mats for surface working
Cardboard bats for storing work

1. We began this week's lesson by looking at dragon sculpture from around the world, and discussing size, materials used, dragon lore and more. Students spent a few minutes drafting ideas in their sketchbooks, considering different body shapes, surface textures,  and added features like fire.

2. I gave students two pieces of clay, one for the dragon, and one for a base of some kind.  They formed a rock or platform of some type to set their dragon on.

3. Several students had observed that many of the dragons had serpentine body shapes, so we began our sculptures with thick, snakelike bodies, then adding legs, tails, wings and other body features. All bits were attached securely using the slip and score method. 

4. Tools were used in different ways to create surface texture like those found on scales, fur, wings, claws, etc. We considered the expressive features we'd add to the faces to indicate qualities of our dragons' temperaments. 

5. Students were reminded to turn the sculptures around and observe all sides, checking for securely attached parts and evenly decorated surfaces.

6. We looked over the finished pieces and briefly discussed the body shapes used, the decorative features, use of materials, and dragon personalities expressed in facial features.

7. Dragons are set aside to dry and will be fired and later glazed.


Clay 3 : Storytellers, Dragons, Gargoyles and more

Original Story Teller Figure by Helen Cordero
Helen Cordero at work on a Story Teller figure
Clay 3  Story Tellers 

This was a five week after school clay workshop for students in grades 3, 4, and 5.  Building on skills learned in previous classes, we moved forward in doing figurative work with animal and human themes. 

For the first week, we focused on the work of Cochiti Pueblo artist Helen Cordero, who began her art journey making ceramic vessels, but later changed direction and moved into doing figurative work.  We looked at her Story Teller figures, based on her childhood memories of time with family. 

Materials Needed
Sketchbooks and pencils
White low fire clay
Clay tools
Water
Canvas mats for work surface

1. We looked at photos of Helen Cordero at work on her Story Teller figures, observing the adult figures, the size and location of the child figures, colors used, facial expressions, etc.

2. We discussed family traditions of story telling and reading, recalling our own experiences.

3. Students spent a few minutes making quick drawings in their sketchbooks to generate ideas for their own version of a story telling figure. 
They needed to include:
                          -One large figure, human or animal
                          -Open mouth on the large figure 
                          -Two or more smaller figures added to original

4. I gave each student two pieces of clay. One for the main figure and one for the smaller ones.  For the larger figure, they rolled out a ball for a head, two long snakes (one for arms and one for legs) and a squarish shaped piece for the trunk of the body.

5. They attached the arm snake across the top of the body, and the leg snake at the bottom, attaching with slip and score technique. Heads were added on last and shaped to include necks. Most everyone made their figure seated for stability.
Bending the legs, the figures were placed on pieces of mat board so students could move their pieces around and work from all sides. 

6. Next, using modeling tools, students added details (clothing, hair, facial expressions, etc) .


7. For tiny figures, we took a small ball of clay and squeezed a neck and head shape at one end. They looked like small bowling pins. Two cuts were made in the sides for arms, and one cut on the bottom, so the two parts could be separated into legs. Students then went to work creating tiny versions of the larger figure and adding them to the large figure securely.

8. Pieces were examined for strength and cracks were smoothed over with fingers.


9. Pieces were allowed to dry for later firing and glazing.
This lesson was one hour in length, with 10 minutes added at end for clean up.
Pieces will later be fired and decorated with bisque stains, using a 3 color palette, in keeping with traditionally decorated Story Teller figures.