Thursday, May 5, 2016

Intro To Clay I : The Art of the Pinch Pot : Mouse Families

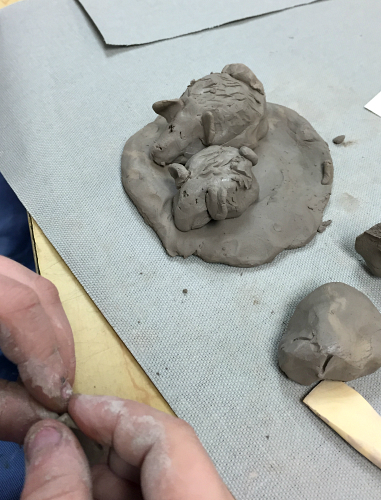
Kindergarten student's mouse family

We just started a new clay workshop for students in Kindergarten, first and second grade that meets after school weekly for 4 weeks, with an exhibition and reception being held in week 5.

This course is called Intro to Clay I : The Art of the Pinch Pot. Our first project is creating Mouse Families.

Materials Needed:
Sketchbooks
pencils
Clay (we used low fire white and terra cotta)
Clay tools
Fabric mats
Water

1. We looked at various artists' interpretations of mice, including sculptor James Houston's Mouse on Cheese. Topics covered included mouse body shapes, textures, identifying features, and details.
 
James Houston's Mouse on Cheese and Iktomi's Mouse

2. Students spent 5 minutes making quick sketches of mice to generate ideas for their clay sculptures.
 
Making preliminary sketches

3. Students received chunks of clay, the size of an adult fist. Rolling it into a fat snake shape, they then divided the clay into 4 pieces.

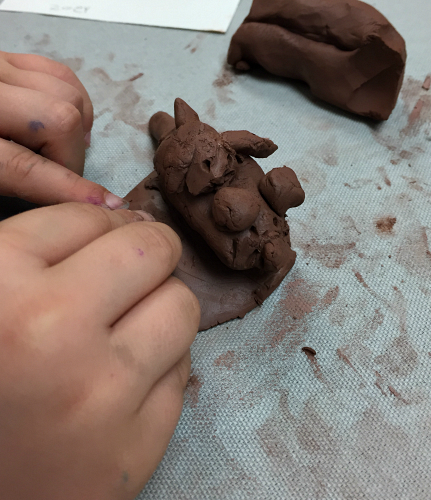
4. The first piece was flattened into a pancake shape for a platform, on which the mice will sit. Make sure the base is sturdy and thick enough to hold the mice.

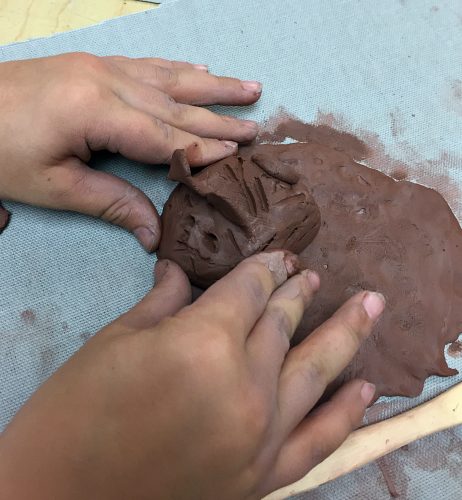
5. Pinching off small bits of clay, they rolled them into balls and formed small pinch pot shapes. Pots were then flipped over and one end made pointy for the face. Next, they rolled smaller balls which were flattened and added for ears. Tails were made into skinny snakes and added last. Mice were scored on the bottom and adhered to the platforms.

6. The final step was to use the clay tools to add fur textures and whiskers.

7. The clay will be fired and glazed in the next few weeks. 


   Here are pictures of the completed sculptures, air drying.
Detail
Detail
Detail

Monday, February 8, 2016

Roller Coasters for Ants Paper Collage

 
Roller Coasters for Ants

 3-D paper sculpture project

This is a lesson I did recently with a Kindergarten class. The focus of this project was to show them how to transform two flat pieces of paper into a three dimensional paper structure using a variety of folding and shaping techniques.

Intro: We discussed ants and what they do (dig, carry things, locate food, in essence, as one child said, ants work ALL the time). Since ants are continuously working, we decided to build a place where those ants could have some fun...on roller coasters!
Roller Coasters, we decided, are tall, have overlapping shapes and lots of curves.

Materials you will need:
1. 9x12" construction paper, assorted colors
2. Glue or glue stick
3. Scissors
4. Marker, crayon or tiny bits of black paper (for ants)


The Process
Select 2 colors for your roller coaster. One for a base, one for the coaster parts.


Using scissors, cut one piece of paper into strips, cutting along the length of the paper. I told them their scissors were like cars, driving slowly along the edge of the road. No worries if the strip is not exactly straight or doesn't quite reach the end of the paper. Set aside the cut strips.

I did a quick demo to show how to bend the ends of the strips and add ONE dot of glue. Place the strip firmly on the base paper. It helps to count to 10 to ensure the paper is securely attached.


Continue with the remainder of strips, adding at least 3 more to the base in different locations.

To make the coaster taller, add a strip to the tops of 2 strips already on the base. Continue around on the paper to achieve more height. I mentioned that they could make their coasters as tall as they wanted. Remind students they can overlap their strips.
                                     

Add circle shape loop-d-loops for the daredevil ants. Do a zig zag fold on a strip to create a staircase (in case ants get too scared and want to climb down). Continue building until the structure reaches the desired height. It might even begin to resemble something from the world of Dr. Seuss.
                   

When all strips are glued on the base, use marker or crayon to draw on the ants. Some students preferred to cut out little ants from scraps of black paper. They were eager to take these home and continue working on them and to set them outside and wait to see who might show up and climb aboard!


Display all work on a table and discuss.

Skills and objectives in this lesson:

Identifying shapes
Developing cutting skills
Demonstrating the use of overlapping
Understanding the difference between 2-d and 3-d
Using 2-d elements to create a 3-d paper collage 

Monday, June 22, 2015

Clay Sunflower Yard Art


Clay Sunflower Garden Art
(week #6 of a 6 week clay course for kids)
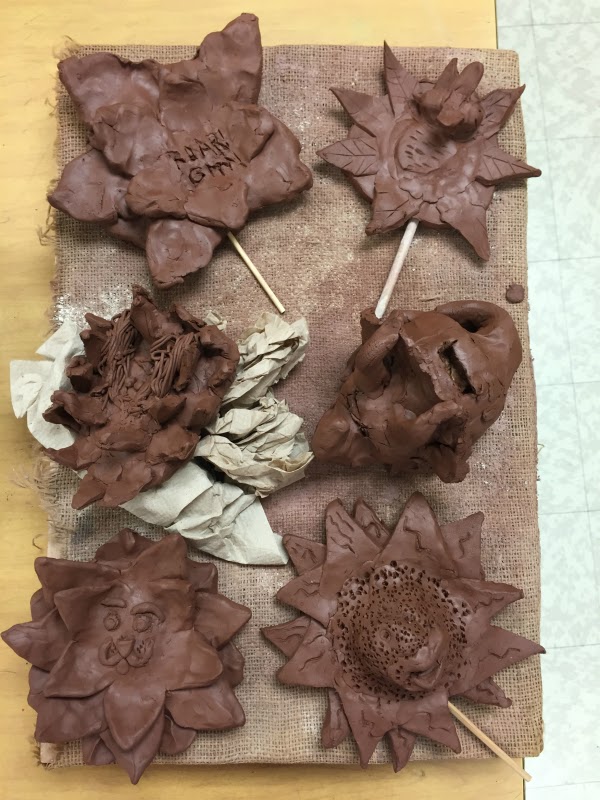
Since this was the final clay class before school let out for summer holiday, we decided to focus on creating pieces for our gardens using terracotta clay. We looked at images of sunflowers, made clay versions and then added whimsical facial expressions. The finished pieces could either be laid in the garden or put on a metal stake for display.
Supplies and Materials Needed for this Project
 Sketch paper and pencils for recording ideas
Low fire terracotta clay
Rolling pins
Modeling tools
Bamboo skewers or skinny dowel rods
  • Roll out clay using wooden strips to ensure uniform thickness for base of flower
  • Cut out a basic sunflower shape


  •  Next, make petals for the flowers, either by cutting out shapes from the slab or hand forming. Use slip and score technique to securely attach all petals to the base. Add interest by overlapping the petals.
                                              

  • Using the modeling tools, add texture to the petals
                                                      
                                                
  • Once all the petals are in place, use a piece of clay to form a small ball, slightly flattening it on one side . This will be the center of the flower
                                                        

  • Attach the ball to the flower's center (slip and score). Next, begin making facial features out of small bits of clay and adding them to the ball.
                                              
A student adds a smile to her sunflower

  • Consider the expression on the flower's face and how shaping the clay can show that expression. Use a tool to add designs for seeds if desired
                                         

  • Some students added insects to their flowers. Double check to ensure all bits are securely attached.
                                                        

  • The final step is taking a bamboo skewer or small dowel rod and making a hole in the flower, if it is to be displayed on a stake in the garden. Hold the flower in one hand and gently push the skewer or rod into the bottom of the flower, rotating it as you go. Set aside to dry. NOTE: AFTER A FEW HOURS, TURN THE SKEWER OR ROD GENTLY IN THE FLOWER AND THEN REMOVE
  •  The rod MUST BE REMOVED before the clay is completely dry or the clay will shrink and breakage will occur on trying to pull it out later
  • Allow clay to dry completely and then fire.
                                                    
                                                      
Happy Sunflower

                                                                        
Giant Sunflower
                                                                                     
Sunflowers with details added


sunflowers ready to dry

  • We left some of our sunflowers the natural color, but if desired, they can be decorated with glazes or acrylic paints. 
                                                      
Glazed Sunflower Garden Art


Saturday, June 20, 2015

Pop Art Style Clay Pizza Sculpture

Olive and Mushroom slice, Donut covered pizza slice

Pop Art Style Clay Pizza Sculpture
(week #5 of a 6 week clay course)

For this week's class, we looked at some of Claes Oldenburg's food sculpture pieces as inspiration for making our Pop Art Style Pizza sculptures. I told this group to go wild with the toppings and put things on their pizzas they wouldn't normally expect to see. They had fun with this project and quite a lively discussion about what types of things they'd add to their sculptures.

Supplies and Materials Needed for this project

Sketch paper and pencils for idea generation
Low fire clay
Large paper circle, 16" in diameter, cut into 8 equal slices
Rolling pins 
Modeling tools
  • Make quick sketches of pizza slices with favorite toppings
  • Roll out the clay, using strips to ensure uniform thickness
  • Cut out a 16" diameter circle from paper. Fold into 8 sections and cut into pieces to create patterns for pizza slices
  • Put slice pattern onto slab, trace and cut pizza slice shape
  • Add a snake shape for the crust. Slip and score to adhere securely.
 
Adding clay for the edge of the crust
Securing the crust 
    Adding toppings to make a pizza face
  • Next, use remaining slab bits to cut out pizza toppings such as vegetables, pepperonis, olives, etc.
    Cutting out toppings   

                                                           
  • Use a garlic press to make cheese. Securely attach all toppings
                                                        
                                                          
Mega cheese pizza


  • Allow clay to dry thoroughly and then fire.
  • Glaze or decorate with acrylic paints and a gel gloss medium 
  • Makes a nice display presentation to put the pizza slices arranged in a circle inside a clean pizza box.
                                                      
Decorated with acrylic paint and gloss medium
                                                         
Decorated using acrylic paint and gloss medium