
This was the first class of a 4 week clay after school workshop for students in Kindergarten, first, and second grade. Some of the students were new to clay, while others had previously had experience with some type of clay.
Materials needed
Low fire white clay, split into 4 oz (115g) portions, with one for each student
Boxwood clay tools
Mini sketchbooks
Pencils
Plastic drink bottle lids with water
Paper cut into 4" squares
Visuals of mice sculptures by various artists
1. We looked at various artists' interpretations of mice, discussing what kinds of materials were used, what the mice were doing, identifying characteristics of mice, colors, textures, and expressive qualities.
 | |
| Mice sculptures by various artists |
2. Students spent 10 minutes making mice drawings in their sketch books to generate ideas for their clay sculptures.


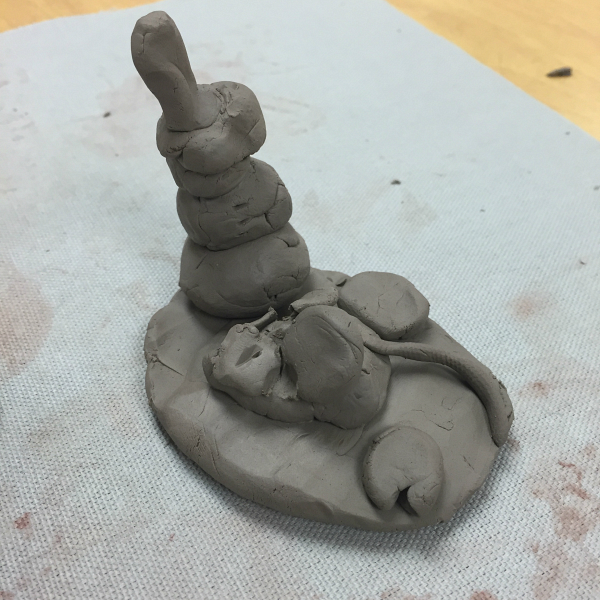
3. Next step was a short clay demo. I took a 4 oz ball and divided it in half. One piece I flattened, like a pancake, to act as a patch of landscape. The other piece I divided into smaller pieces. Rolling one piece into a ball, I pressed one finger inside and proceeded to turn it, while pressing all the way around to form a small bowl. Next, I flipped it over and made one end pointed for the nose. I demonstrated how to use the additive method to attach mini pancake shapes for ears, snakes for tails and little balls for eyes. I find it helpful to put lids from one gallon water bottles in the center of each table, each with water for use in attaching clay pieces together. The small sizes of the lids ensure that students don't add too much water to their sculptures.


4. Modeling tools were used to add details like fur, dots in the eyes, and for smearing the seams where two pieces of clay were attached to one another. I told them it is a bit like smearing peanut butter on bread with a knife...they were to make sure pieces were all firmly attached.
5. Finally, mice were attached to the landscape patch and if desired, lines added for grass, plants, etc. Extra bits of clay were added for cheese, or other items the mice were eating.


6. I had them place each of their sculptures on the 4' square papers with their names on it, so I could add the names to the bottoms of the clay pieces later. This takes a few minutes for me after class, but saves tons of time later when returning fired pieces to their creators. Their handwriting can get illegible when being written on the underside of wet clay.
7. Pieces were set aside to dry and will be fired later.